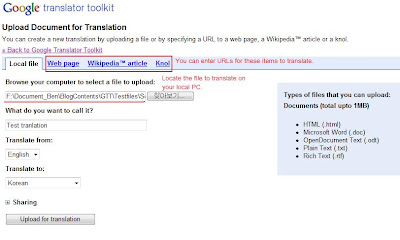
In this section, you can upload the file or add the URL to translate on Google translator toolkit.
Click “Upload” button on Active section, then you move to the next page where you can locate the file to translate on your local PC or enter the URL that you want to translate including Knol and Wikipedia™ article URL. You can specify the name of translation. This name will be used like a project name that is displayed on Active section. You can also specify source and target languages for translation. When you click the “Sharing” icon, all the instructions about adding and creating TM will be shown. The point is you can add TM to use during translation or create TM that will be automatically stored on the web space that Google provides if you don’t have any prepared TM, and this TM can be shared with other users if you want (you can select the option).
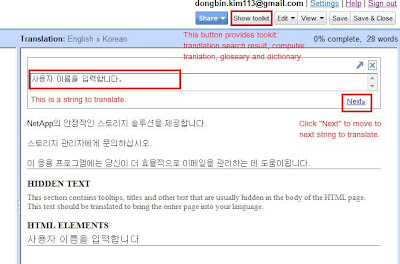
 Once you click "Upload for translation” button, it goes to translation mode (I would like to call that). It shows all the information you need for translation such as statistic information, translation search result from TM, dictionary, and source texts on the left and target text on your right. The most amazing thing is that it shows automatically machine translated target texts even if you don’t add any TM.
As you can see in the above screenshot, all these translation on the target area is computer translation and the quality was way better than I have expected. Test sentences, however, was simple sentences and I am not sure how it would work on complex and long sentences. This machine translation function can be enabled or disabled on the settings page.
No comments:
Post a Comment